Difference between revisions of "Love - GUI"
(→Array of Screens) |
(→Screen Base Class) |
||
| Line 73: | Line 73: | ||
=Screen Base Class= | =Screen Base Class= | ||
| − | Create a new class to be the base of every screen: | + | Create a new class to be the base of every screen, remember this should be at the top of your code and not in any other functions (such as 'love.load'): |
<syntaxhighlight lang=lua> | <syntaxhighlight lang=lua> | ||
Latest revision as of 12:39, 14 October 2019
Get GOOi
Visit the following github repository:
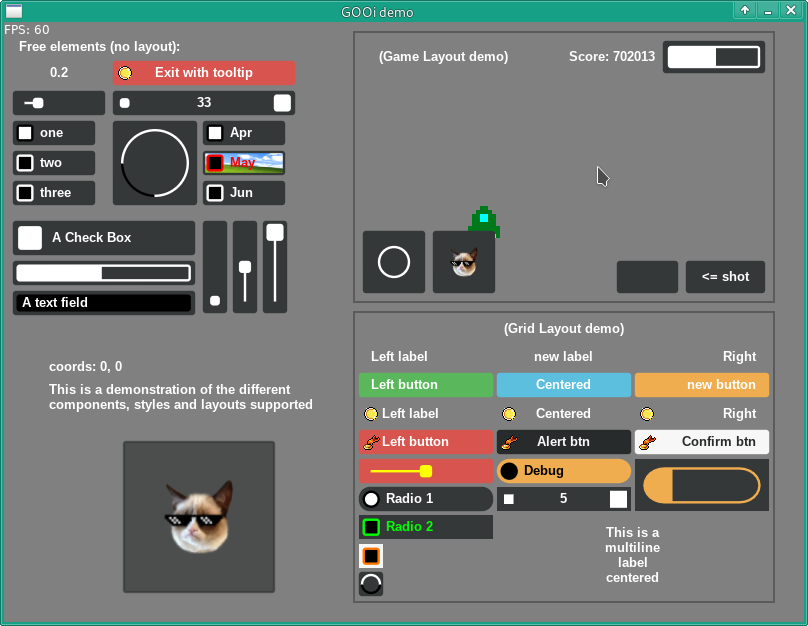
Click clone or download, and download a 'zip' file. When you extract the zip file, drag the folder onto your LOVE shortcut to see the demon page:
Rename main.lua
Go into the folder and rename the 'main.lua' to something like 'mainold.lua'. It will be important to keep the old version for reference. Now create a new file called 'main.lua' for this tutorial and enter this:
function love.load()
  gr = love.graphics
  kb = love.keyboard
  mo = love.mouse

  gr.setBackgroundColor(0.5, 0.5, 0.5) -- change this for background of whole window

  function width() return gr.getWidth() end
  function height() return gr.getHeight() end

  imgDir = "/imgs/"
  fontDir = "/fonts/"

  -- change these to change how each panel/menu looks
  style = {
    font = gr.newFont(fontDir.."Arimo-Bold.ttf", 13),
    showBorder = true,
    bgColor = {0.208, 0.220, 0.222}
  }
  gooi.setStyle(style)
  gooi.desktopMode()

  --gooi.shadow() -- More options
  --gooi.mode3d() -- More options
  --gooi.glass() -- More options

  --gr.setDefaultFilter("nearest", "nearest")
end

function love.update(dt)
	gooi.update(dt)
end

function love.draw()
	gooi.draw()
end

function love.mousereleased(x, y, button) gooi.released() end
function love.mousepressed(x, y, button)  gooi.pressed() end

function love.textinput(text)
	gooi.textinput(text)
end

function love.keypressed(key, scancode, isrepeat)
  gooi.keypressed(key, scancode, isrepeat)
  if key == "escape" then
    quit()
  end
end

function love.keyreleased(key, scancode)
  gooi.keyreleased(key, scancode)
end

function quit()
  love.event.quit()
end
Screen Base Class
Create a new class to be the base of every screen, remember this should be at the top of your code and not in any other functions (such as 'love.load'):
require "gooi"

function Screen(x,y,w,h)

	local self  = {
		xc =x,
		yc=y,
		wi=w,
		he=h
		}

	function self.clear()
		gooi.removeComponent(self.panel)
		self.panel=gooi.newPanel({xc, yc, wi, he, layout = "game"})
	end

	self.panel = gooi.newPanel({xc, yc, wi, he, layout = "game"})

	return self
end
This will be inherited by the other screens, and give them a common base. The 'gooi.newPanel' will be a component to which you can add other components. The 'clear' function is to easily remove a panel.
MainScreen Class
This inherits the base class and is for a specific screen, each required screen will need to be declared as a class of 'Screen':
function MainScreen (x,y,w,h)
	local self = Screen(x,y,w,h)

	function self.init()
		-- add your gooi components here
		self.panel:add(gooi.newButton({text = "<= shot"}), "b-r")
		self.panel:add(gooi.newText({y = 100, w = 100, h = 22}):setText("A text field"),"t-l")
	end

	return self
end
The init method is to define the components and will also cause the panel to be displayed.
Array of Screens
Next we can create an array for the different screens within the project, try to add this code at the top of your code:
Screens = {}
You can then add each screen to the 'Screens' structure, add this to the 'love.load':
Screens[0] = MainScreen(5,5,200,200)
You can then use the init & clear methods to set the screen to display.
Screens[0].clear()
Screens[0].init()
