Creating An Instance of Your Player
You should at this stage have a Player class created and defined. The next stage is to create an instance of the class (the class is a definition similar to a class of Human, you are an instance of the class human).
Create a Player
In order to be able to use the Player class we need to add the code Player player; into the using section of your Game1.cs file. It must go between the public class Game1:Game line and the public Game1() line:
public class Game1 : Game
{
    GraphicsDeviceManager graphics;
    SpriteBatch spriteBatch;

    Player player; // adds player to class instance

    public Game1() { } // Continued ...
The Initialize method is called immediately before your game is run. The code above has declared an instance of Player, to create the instance we need to add the code player = new Player(); into the Initialize method of Game1.cs:
protected override void Initialize()
{
    // TODO: Add your initialization logic here
    // Initialize the player class
    player = new Player();
    base.Initialize();
}
The LoadContent method is run once during your game, and it will be once once the game is started (but after Initialize).
This method should be used to load your games contents. Add the following code after the spriteBatch = new SpriteBatch(GraphicsDevice); line:
// Load the player resources
Vector2 playerPosition = new Vector2(GraphicsDevice.Viewport.TitleSafeArea.X, GraphicsDevice.Viewport.TitleSafeArea.Y + GraphicsDevice.Viewport.TitleSafeArea.Height / 2); // Sets player position to center of screen
player.Initialize(Content.Load<Texture2D>("Graphics\\player"), playerPosition);
As for how to load content into your program, you must first move any relevent files (images, bitmaps, soundwaves etc.) into your content folder via the builtin Microsoft.XNA Content Pipeline (To do this in visual studio just navigate to the folder and double click on the content executable; the following steps are quite straightforward and hence I will omit them). After this has been done, you can use the Content.Load<DType>("Path\\To\\File") method to access anything in your content folder (S.N. the return value is an instance of the file and hence can be stored).
The Draw method is called when your game needs to draw itself. Add the code below into the Draw method of Game1.cs:
// Start drawing
_spriteBatch.Begin();

// Draw the Player
player.Draw(_spriteBatch);

// Stop drawing
_spriteBatch.End();
Any drawing to the screen should now be placed between the Begin() and End().
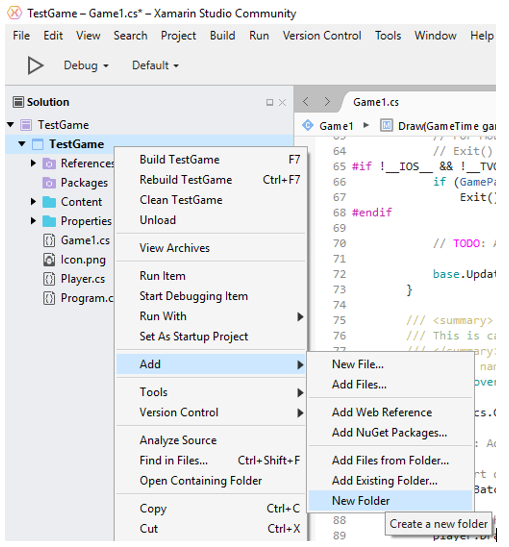
The graphic for the ship can be downloaded from this link: Player Zip File. You will need to extract the archive to use later. Now we need to create a folder for Content and within that a folder for Graphics, you can do this by right clicking on the project folder in the solution explorer and choose Add followed by New Folder and call it Content:
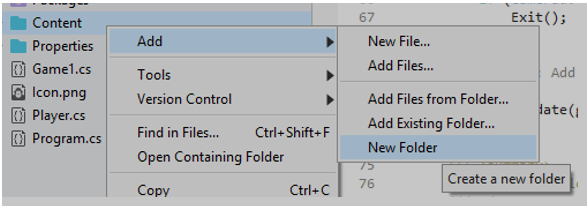
Now right click on the folder you just created, and create a new folder called Graphics:
You can now right click on the graphics folder and Add from an existing folder:
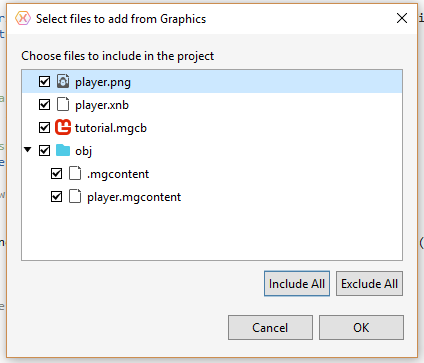
if you browse to the folder you extracted the zip file to. You will then get a list of files in the folder and each should have a tick box. Click the button to select all files.
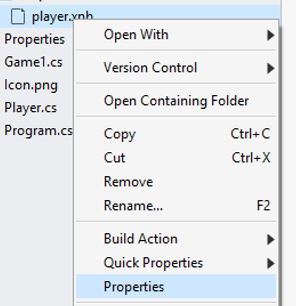
We need to change the properties of the player.xnb file, so right click it and select properties:
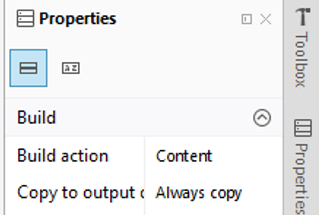
You need to change Build Action to Content, and the Copy to Output Directory to Copy Always:
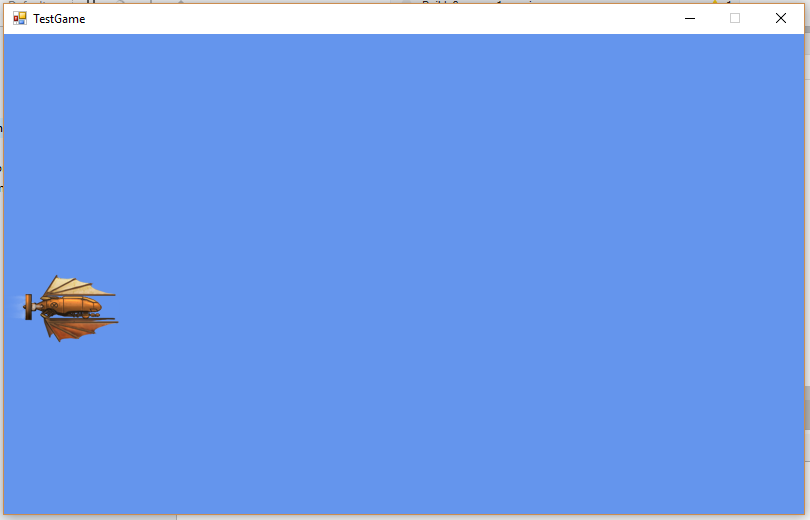
If you now start your game again, you should now have the player displayed.
